• Skip to primary navigation
  • Skip to main content
  • Skip to primary sidebar

Appliance. net

Appliance news, reviews, ratings, forums, reports and buyers guides.
Locate repairs and parts. for home and kitchen appliances.

  • About Appliance.Net
    • BestPrice Family
    • Contact
    • Become a Featured Dealer
    • Retailer & Repair Services Advertising
  • Shopping
  • Appliance Forum
  • Manufacturers
    • Manufacturers 800 Numbers
    • Aga
    • Bosch
    • Caldera
    • Dacor – The Life of the Kitchen
    • General Electric – GE
    • Jenn Air
    • Sears – Kenmore
    • Thermadore
  • Sections
    • Features
    • News
    • Recalls
    • Kitchen
      • Dishwasher
      • Ranges Ovens and Cooktops
      • Refrigerators and Freezers
      • Microwave Oven
    • Household
      • Consumer Electronics
      • Heating and Cooling
      • Vacuum Cleaners
    • Laundry
      • Washing Machine
      • Dryers
    • Safety
You are here: Home / Archives for Recipes

Recipes

Cook Your Holiday Turkey in the Dishwasher

December 24, 2009 By NightOwl

Here’s something to do while the kids are home from school and you have vacation-itis. Entertain the folks with dinner cooked in the dishwasher.

Cooking Method & Considerations

Allow one 50-minute cycle for every 2lb of weight. Hermetically seal a seasoned turkey inside several appropriate turkey-sized oven bags.

Place the turkey in the dishwasher to steam-cook.

When cooking a turkey, ensure that the temperature of the meat doesn’t rise above the recommended 145f by using a meat thermometer.

Test Run

As a trial run, a 5lb supermarket chicken was cooked in the dishwasher providing impressive results: firm, tender, moist breast meat.

Two cycles were used, and the bird was finished off in the oven to brown and crisp the skin.

Getting a whole turkey cooked this way might take all day, so Electrolux (where I found this wacky idea) suggests their Steam Combination oven as a quicker, (saner?) option.

Filed Under: Cooking, Dishwasher, Features, Humor, Kitchen, Recipes Tagged With: cooking a turkey, cooking a turkey in the dishwasher, cooking in the dishwasher, Dishwasher, holiday cooking, oven bags, turkey

Use Your Appliances to go Green in the Kitchen – Plus a Few Other Helpful Suggestions

May 4, 2009 By NightOwl

Another Earth Day has passed us and just as we make resolutions on New Year’s Day, you might have planned to change your energy wasting ways. Those New Year’s resolutions are difficult to maintain, because we often try to do too much. Making just a few small changes is helpful and can be the key to lasting change.
Lisa Abraham at Ohio.com has compiled her tips for saving energy in the kitchen. They include being creative when using kitchen appliances and modifying some eating habits.

Limit the time the stove/oven is used

Never light the oven or turn on a burner when a small appliance will do the job. Microwave ovens, toaster ovens, electric griddles, panini makers and, yes, even a slow cooker all consume less energy than a traditional gas or electric stove.

Consistently using these small appliances can make a huge difference in your energy consumption, Jackie Newgent a dietitian, cooking instructor and cookbook author of the newly released Big Green Cookbook (Wiley, 2009). said. Even though slow cookers are typically on for hours at a time, they will burn less energy than a traditional oven to prepare the same dish, such as a roast.

Look for ways to lessen the amount of time the oven and burners are on. When cooking pasta, Newgent recommends using skinny varieties, like angel hair, that will cook more quickly. She also uses a method she dubs ”lid cooking” to turn the stove off sooner.

Newgent brings a pot of water to a boil, adds her pasta and brings it up to a boil again. But then she turns the heat off, puts a lid on the pot, and lets the pasta finish cooking from the heated water.

When baking something, turn the oven off five minutes before the item is done and allow the residual heat in the oven to finish the job, she said.

Consider making one meal each week that doesn’t require using the stove at all, such as a salad.

Eat more fruits and vegetables, less meat

Newgent suggests eating one meatless meal per week. It requires more energy to produce meat than vegetables and fruits. Cutting meat out of just one meal per week can lead to significant energy savings over a year, she said.

That salad fits in well here. Think of it as a chance to be a more adventurous eater.

Run an energy-efficient kitchen

While new major kitchen appliances may not be in the budget for many homeowners, most would see an immediate savings on electric bills with the conversion.

Refrigerators should be away from sunlight and heat sources, like ovens. The warmer the environment, the harder the appliance will have to work and the more energy it will use.

Refrigerators also need breathing room — at least two or three inches of open space between the coils and the wall behind them to allow for better air circulation. Keeping refrigerator coils clean of dirt, dust and pet hair also will improve performance.

The harder an appliance has to work, the faster it will wear out.

Constantly opening and closing the refrigerator causes it to lose cold air. The same goes for the oven — keep the door closed as much as possible while in use to keep the hot air inside.

Gas stoves typically are less expensive to run than electric ones.

Always have the dishwasher fully loaded before running, and consider scraping your dishes instead of rinsing them before loading, to save on water.

Newgent also noted that when cooking outdoors, choose a gas grill over charcoal because gas emits less carbon into the atmosphere.

Here is a sample recipe from Jackie Newgent’s Big Green Cookbook:

CITRUS CREAM OF CAPELLINI

13/4 tsp. sea salt, or to taste
12 oz. whole wheat capellini or angel hair pasta
1/2 cup organic heavy cream
1 tbsp. unsalted organic butter
Juice and zest of 1 lemon (about 3 tbsp. juice)
1/4 tsp. freshly ground black or white pepper, or to taste
1/3 cup freshly grated organic or locally produced Parmesan cheese
1/4 cup chopped fresh flat-leaf parsley
1/3 cup raw pine nuts (optional)

Bring 6 cups fresh water and 3/4 teaspoon of the salt to a boil in a large saucepan over high heat. Add the pasta and return to a boil. Cover and turn off the heat. Let the pasta ”lid cook” (cook covered while the burner is off) until it is al dente, about 6 minutes. Drain the pasta, reserving 1/2 cup of the cooking liquid.

Place the drained pasta back into the dried saucepan and set over medium-high heat. Stir in the cream, butter, lemon juice and zest. Cook while stirring until the pasta is hot, about 1 minute. For a thinner sauce, add the reserved pasta cooking water. Add remaining salt and pepper.

Pour the pasta into a serving bowl or serve directly from the saucepan. Sprinkle with the cheese and parsley. Top with the pine nuts, if using, and serve.

Makes 6 servings, 1 cup each.

Filed Under: Cooking, Dishwasher, Features, Household, Kitchen, Microwave Oven, Ranges Ovens and Cooktops, Recipes, Refrigerators and Freezers, Small Appliances, _ Tips Tagged With: appliance maintenance, cooking green, cooking with appliances, Dishwasher, energy saving appliances, energy saving cooking, kitchen appliances, save energy, saving energy in the kitchen, using appliances

Crock-Pot Wonders

March 30, 2009 By NightOwl

I’ve owned a few crock-pots over the years. Right now I have two- both of them the large six quart models made by Rival. They are both basic models that have a simple central knob for choosing a low or high setting. I prefer my appliances simple and these are perfect for me.

Many people are discovering or rediscovering the humble crock-pot or slow cooker. They offer convenience, and economy. A slow cooker and turn a tough (and cheaper) cut of meat into a tender main dish, ready for dinner when you return home after a long day. Today, about 83% of American households own a slow cooker, according to the NPD Group, a leading marketing research firm. Of these households, almost half used a slow cooker within the past month.

While I heartily recommend my style of slow cooker, the folks at the Los Angeles Times, took a look at a few newer, sleeker models out there and offered these comments:

West Bend’s 5-Quart Oblong Slow Cooker promises an all-in-one slow cooker and griddle, with an insert advertised to be safe for the stove top and oven; it also comes with its own carrying case. The adjustable temperature control has five settings.
What we thought: The model promises a lot and delivers little, if anything. The model automatically starts warming as soon as it’s plugged in — there is no “off” setting — which could lead to burns if you’re careless. Although it’s marketed as oven- and stove-top-safe, in the manual’s fine print there are limitations to how high the thin insert can be heated. Only plastic or rubber utensils can be used with the insert, as metal can scratch the coating. The lid does not securely cover the insert and easily falls off. The model takes forever to heat up, as does the griddle (it took us 45 minutes to fry three pieces of bacon and 10 minutes to fry an egg with the griddle on the highest setting). About $55.

The KitchenAid 7-Quart Slow Cooker is big in capacity and power. It heats quickly with its 400-watt heating element and boasts an accurate and responsive “electronic temperature management system.” It offers 10 hours of programmable cooking time, automatically lowering the heat to warm when the timer is done. The settings: buffet, simmer, low, high and auto.
What we thought: Everything about this unit is big; there’s even a bumper at the back of the unit. The 7-quart ceramic insert is heavy and awkward on its own; filled, it requires a good amount of strength to move. However, it has large — and very convenient — level indicators, so you know the volume of contents you’re cooking. The big digital cooking display is easy to read. The lid does not always sit flush against the top of the insert. The unit heats up very quickly and adjusts throughout to maintain consistent temperature. The insert and lid are dishwasher-safe. About $130.

The All-Clad 7-Quart Deluxe Slow Cooker offers a cast-aluminum insert that is oven- and stove-top-safe (both the insert and lid can function on the stove top as a Dutch oven). The programmable timer automatically switches to warm when cooking is complete. The model features a stainless steel exterior.
What we thought: This is one massive and expensive showpiece. The exterior is big and impressive, but after a couple of uses we found the stainless steel hard to keep clean and almost unbearably hot. The stainless steel lid prevented us from being able to check on contents as they cooked; the lid itself was very thin and lightweight and the handle got so hot a potholder was required. The cast aluminum minimizes mess and eases cleanup. About $280.

And their favorite:

Cuisinart’s 3 1/2 -Quart Programmable Slow Cooker includes a ceramic insert that is stick-resistant and dishwasher-safe. The model comes with a 24-hour LCD countdown timer that automatically switches to warm when contents finish cooking. Four settings: high, low, simmer and warm.
What we thought: This slow cooker was one of our favorites. The programmable timer is a big plus, allowing the cook to set the cooking time in half-hour increments. The ceramic insert offers consistently reliable heating and cooking. The insert and lid are dishwasher-safe. About $60.

One of my favorite cooking sites, allrecipes.com has a highly rated recipe for chicken and dumplings you can try next time you want a comforting meal ready right away when you get home.

You can read all the reviews here.

Filed Under: choosing a Kitchen Appliance, Cooking, Features, Kitchen, Recipes, Reviews, Small Appliances Tagged With: crock pot, crock pot reviews, LA times reviews, slow cooker, slow cooker recipe, slow cooker reviews

Admit it – You Love Your Microwave

February 20, 2009 By NightOwl

Microwaves are one of the great conveniences of life. They heat up our coffee and lunch at work, make popcorn for snacks and heat up leftovers for a quick dinner.  While most of us admit to using the microwave for these tasks, there are fewer who find they truly cook meals using them.

“Everyone says that all they use it for is defrosting, reheating and making popcorn,” Johanna Burkhard says at a recent Microwave Myth Debunking session put on by Panasonic at Toronto’s Calphalon Culinary Centre, “but when I tell them to write down everything they’ve put into it over a week, they surprise themselves.”

Burkhard should know. She wrote the book on it. Or rather, one of the books on microwave cooking, hers being 125 Best Microwave Oven Recipes. Other best-sellers include The Well-Filled Microwave Cookbook and Microwave Gourmet by Barbara Kafka, regarded as the bible on the subject.

Your may find that you mostly melt chocolate or steam some broccoli in your microwave but Burkhard shows that you can whip up several fast and nutritious dishes, including perfectly cooked asparagus with Gorgonzola and pine nuts, Mediterranean chicken, and an especially tasty one-dish meal of spicy ginger salmon with steamed vegetables.

Go ahead, try it:

JOHANNA BURKHARD’S SPICY GINGER SALMON WITH STEAMED VEGETABLES – 3 tbsp (45mL) orange juice – 4 tsp (20mL) soy sauce – 1 tbsp (15mL) rice vinegar – 1 tbsp (15mL) packed brown sugar – 1 tsp (5mL) cornstarch – 2 tsp (10mL) minced fresh ginger – 1 small clove garlic, minced – ½ tsp (2mL) chili paste or to taste – 2 centre-cut salmon fillets (5 ozs/150g each), skin removed – 1 cup (250mL) thinly sliced mushrooms – 2 cups (500mL) shredded Swiss chard or spinach – ½ red bell pepper, cut into 2″ (5cm) thin strips – 1 green onion, finely sliced

1. In a glass measure, blend orange juice, soy sauce, vinegar, brown sugar and cornstarch until smooth. Add ginger, garlic and chili paste. Microwave on high for 1 to 1½ minutes, stirring once, until sauce comes to a full boil and thickens. Sauce will be quite thick. 2. Place salmon in an 8″ (2L) glass baking dish, pour prepared sauce overtop, cover with microwave-safe plastic wrap and turn back one corner to vent. Microwave on medium (50% power) for 3½ to 5 minutes or until fish is just opaque.

3. Layer with mushrooms, Swiss chard, red pepper and green onion. Cover and cook at medium for 3 to 4 minutes or until Swiss chard is just wilted and pepper is tender-crisp.  (I suggest serving this with rice.) Makes 2 servings.

Filed Under: Cooking, Features, Kitchen, Microwave Oven, Recipes, Small Appliances Tagged With: Cooking, cooking in a microwave, easy cooking, microwave, microwave cooking, Microwave Oven, microwave recipes

Fresh home made ice cream for the Fourth of July

June 29, 2007 By NightOwl

One of my fondest childhood memories is of eating homemade chocolate ice cream on the Fourth of July. statue of liberty Fourth of July FireworksI can still hear in my mind the sound of my parents’ ice cream maker churning for hours in the bathtub. (Where it was placed to catch the water from all the condensation that would form.) I also remember the great fun we kids would have smashing blocks of ice into the crushed ice needed to fill the bucket around the ice cream canister. My mother would fill milk cartons with water and freeze them a few weeks before the holiday in preparation for the big day.

make-healthy-rich-home-made-ice-cream-for-your-kidsNow that I’m a mother, I not only make ice cream on the Fourth of July, but on any day I want to give my family a special treat. Old fashioned ice cream makers like my parents’ are still out there, (you can even find ones that require hand churning) but I have one of the gel-canister types that is much less messy. Some advance planning is still necessary, as the canister must be frozen for at least twenty four hours before use, but if you store it in the freezer, you are always ready for spontaneous ice cream making.

Here are a few tips for making your own ice cream:

  • The gel-canister should be completely dry before being frozen overnight.
  • If you plan to store it in the freezer, place the canister in a bag to keep it free of crumbs and ice that might fall on it.
  • Ice cream bases must be thoroughly chilled before processing.
  • Processing times vary, start checking at around twenty minutes.
  • Add nuts, etc. thorough the lid opening during the last few minutes of processing.
  • Let the canister thaw completely before washing.
  • Be gentle with the canister; some can be easily punctured by a sharp tool.

Chocolate ice creams are still my favorite, but vanilla is a big hit in this house as well. I have also found that a good vanilla base is a great start for fruit ice creams. Here are some basic recipes and variations from the manual that came with my Hamilton Beach ice cream maker, that I have used and enjoyed.

Old Fashioned Vanilla Ice Cream

¾ C sugar
dash of salt
1 ¾ c whole milk
2 eggs, beaten
1 ½ C heavy whipping cream
1 tsp vanilla

Combine the first three ingredients in a heavy saucepan, and cook over medium heat stirring until mixture is steaming. Reduce heat to low.

In a medium bowl whisk eggs and slowly whisk in half the hot mixture and then pour all back into the saucepan. Cook until slightly thick, about three minutes. Remove from heat and chill.
When ready to freeze, stir in heavy cream and vanilla. Follow directions for freezing in your ice cream maker.

Because that recipe requires advance preparations, and I tend to do my cooking on the spur of the moment, I use the next recipe most often. I also try to cut back on fat and calories where I can and I have found that I can turn this recipe into low fat ice cream (or ice milk) by substituting half and half for the cream and 2% milk for the whole milk. It is definitely a less creamy, icier dessert, but then I don’t have to feel so guilty eating it.

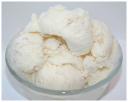
Easy Vanilla Ice Cream

1 C sugar
2 tsp lemon juice
2 C whipping cream
1 C milk
1 tsp vanilla

Combine all ingredients, mix well and freeze according to manufacturers directions.

home-made-vanilla-ice-cream

Some variations we enjoy:

Cookies and Cream– reduce the sugar to ½ cup and add about 15 broken chocolate sandwich cookies after about 15 minutes of churning.

Mint Chip – Substitute mint extract for the vanilla and add 1 cup mini chocolate chips after about 15 minutes of churning.

There are ice cream makers by Cuisinart, Delonghi, Salton and Rival. You can spend a simple thirty dollars on up to close to three hundred. Kitchenaid even makes an attachment that turns its mixer into an ice cream maker. My simple Hamilton Beach model has worked well for my family; it makes one quart, which serves everyone, (There are six of us.) but rarely leaves leftovers. I sometimes wish I could make a larger quantity, but for the most part this works, and part of the fun is making and eating a new batch.

Filed Under: Cooking, Kitchen, News, Recipes, Refrigerators and Freezers, Small Appliances, _ Tips

Braun Immersion Blender

July 25, 2006 By NightOwl

Braun MR5550MBC-HC Multiquick Professional Hand Blender, MR5550 M BC-HC White Multipurpose

One of the handiest tools in my kitchen is my immersion blender, also known as a hand blender. Immersion blenders have been around for about ten years, and do almost everything that a regular blender does. I have one of the older models made by Braun. Braun makes a number of small household appliances. I also have their coffee maker. (But that’s something for another day.)

For those of you not familiar with an immersion blender, imagine a 12 inch plastic cylinder ergonomically designed to fit comfortably in your hand with a twirling blade at the bottom. To mix, blend or puree, all you have to do is literally immerse the blade in your pot, cup or bowl and push the button. The blade must remain fully immersed or you’ll splatter yourself a bit.

One of the things I like is its ease of cleanup. If you’d like a smoothie, all you have to do is put the ingredients in a large cup, give it a whirl or two, run the blade end under hot water for a few moments and it’s clean. Nothing else to wash but your cup, but of course you’d have that anyway. My Braun hand blender came with a plastic cup as an accessory along with a wall mounting bracket so that it can be conveniently stored in a cupboard. The new models come with a variety of accessories and range in price from around $15.00 to over $400.00 by companies such as Waring, KitchenAid, and Conair.

Something that is important to me, as a matter of both safety and convenience, is the ability to blend right in the pot. If you are making hot soup that needs to be pureed, you have three options.
Wait until it cools and then pour it in small batches into your traditional blender, pour the soup in hot and take the chance of scalding yourself, or, with an immersion blender you can just put the blade into the pot and off you go.

A quick tip: When you are pureeing, be sure to keep the base of the blender at an angle to the base of the pot. If the blender is touching the bottom of the pot, the food won’t circulate, and the machine can’t do its job. I had a friend who had problems using her immersion blender and therefore disliked it. When I explained that you need to keep it angled to allow the food to move through the mechanism she called back to say that it worked perfectly. Depending on the depth of what you are blending you should keep the blade about an inch above the bottom of the pot, and you should move the unit through the liquid as if you were gently stirring it.

The appliance is versatile. Not only do I use it for the basics like milk shakes, smoothies and pureeing soup, it is also wonderful for making homemade refried beans and Hummus. Here’s a recipe you can use to try it out:

Sweet Potato Soup

  • 2 teaspoons butter or margarine
  • ½ cup sliced carrots
  • ½ cup sliced celery
  • 1 ½ cups seeded, peeled and chopped tomatoes
    (or do what I do and use the 28oz can of diced tomatoes)
  • 6 cups broth (chicken, beef, or vegetable – water will do if necessary)
  • 1 ½ pounds sweet potatoes, peeled and sliced thinly
  • pepper to taste
  • Plain yogurt as sour cream as garnish

Jane Brody\'s Good Food Book/Jane Brody\'s Good Food Gourmet/Boxed Set
In a large pot, sauté the carrots and celery in the butter or margarine for about 5 minutes. Do not brown them. Add the tomatoes and cook to reduce the liquid a bit. Add the broth and the sweet potatoes, bring the mixture to a boil, reduce the heat, cover the pot and let it simmer for 20 to 30 minutes or until the vegetables are very soft.

Remove the pan from the heat and puree the mixture directly in the pot. Add pepper and reheat as needed. (This soup can be served cold also, but we prefer it hot) Serve with a dollop of yogurt or sour cream.)

This recipe is from Jane Brody’s Good Food Gourmet.

Filed Under: Cooking, Kitchen, Recipes, Small Appliances, _ Tips

Primary Sidebar

[footer_backtotop]

© 2006-2019 Appliance.net · Log in